Operating Systems
Windows, Mac, Ubuntu, Linux, Palm OS, etc
Mac Operating System
Not software for the OS, but literally the Mac OS
Mac OS Hotkeys & Shortcuts
This section is all about non-listed or non-obvious hotkeys for software. These keys lean Mac OS, but many work on Windows if you substitute Command for Alt.
In creative applications “shift” is generally used as a modifier key to increase the units of an action. In After Effects, for example, shift is a modifier x10 – so if you use the hotkey to advance one frame, and hold shift, it advances 10 frames.
|
Symbols can be found in file→emoji and symbols work within most applications.
The command graphic is called “Place of Interest Sign” (and not “Command”) lol.
Point being, if you're looking to write out a bunch of hotkeys, you gotta type "Place of Interest Sign" in the character viewer. |
|

Mac OS System Wide
| ⌘+, | This triggers preferences or settings in many applications |
| ⌘+C / ⌘+V | Copy / Paste |
| ⌘+Shift+V | Often used as “paste values” rather than paste items. |
| ⌘+S | Save |
| ⌘+Shift-S | Save As |
| ⌘+A | Select All |
| ⌘+I | Get Info |
| ⌘+Option+I | Combined Info of all selected files (allows you to quickly tally up file sizes without manual entry!) |
Mac OS Finder & System Preferences
| Cntrl+⌘+Spacebar | Will open character viewer (on full keyboards, FN does this) |
| ⌘+fn+F1 | This will mirror your displays. This is very helpful when you have a dead display and need to access your files on an external monitor and it’s stuck on “extend.” |
| ⌘+F1 | Toggles mirroring on and off. |
| ⌘+Shift- | Show hidden files (system wide, not just the active directory) |
| Opt+☼ | (Brighten or dim keys, usually F1/F2) will take you to Display system preferences |
| Opt+(any audio key) | (Usually F10/F11/F12) will take you to Sound system preferences |
| Opt+Right Click+Click File | Gives you more contextual options, copy file path is a big one that I can’t believe I’m just learning in 2024. I’ve been dragging files into terminal to get the string for years. |
Mac OS Specific Hot Tips
Stuck Application Windows
Do you have a window that you can’t make full screen because the top of the window is hidden in a nebular black hole between displays? This happens fairly regularly in Premiere. Solution: Hover over any corner until your mouse becomes the resize icon, hold option and then double click. Congratulations, you’ve got your window back and you can bend it to your will.
Wireless Keyboard Chaos
Keyboard not working? “Forget this device” in system prefs, then restart. Toggle the keyboard on and off, and then hold the Command key. You can re-pair it (pun intended).
Computer Not Responding
First try to alternate the following hotkeys in rapid succession ⌘+Tab ⌘+Q. If that doesn’t work, hold down ⌘+Option+Esc for Force Quit. If that doesn’t work, hold the power button down.
System Scheduling
System scheduler is no longer working because Apple got rid of it, and you have an installation that would benefit from an on/off schedule or an auto restart? You gotta do it in command line now. It’s actually pretty easy: See here.
Safe Mode
So, you think you installed something naughty that’s really screwing up your computer? Boot up your computer holding the shift key, this will disable all third party things and you’ll be able to remove things as needed.
Recovery Mode
So, your computer is really struggling and you need to hit up disk utility and/or you need to reformat? Turn on your computer and immediately press ⌘+R fo recovery mode.
Reformatting to APFS
In disk utility, select view and choose “View All Devices” then select the drive’s highest hierarchical item (typically the brand’s enclosure), then hit erase, then hit scheme GUID, then select APFS as the format.
All Computer Characters in Sort Order
On Mac OS, file name sorting isn't case sensitive. Here's a breakdown of sort order from Engadget.
Migration Assistant Fastest Method (Thunderbolt, Baby!)
- Make sure the destination Mac has a higher OS than the previous Mac.
- If the destination Mac is new, you can skip this:
- If you're resetting the destination Mac, make sure you have access to the Apple ID associated with it so that when the computer resets you don't get stuck in recovery lock!
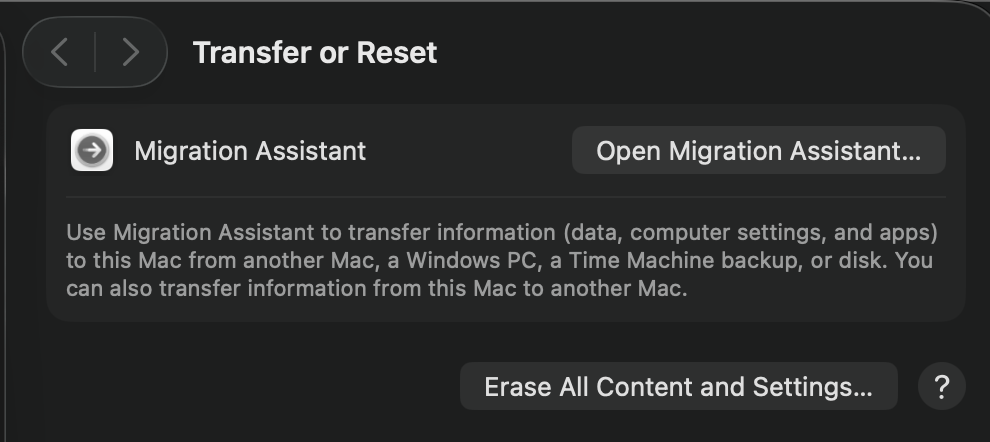
- Reset the mac using Transfer or Reset.
- On the destination Mac, you want to be "fresh outta the box mode" - running Migration assistant after setting up an might not work. Don't fear though, if you've already done that, see Step 2.
- On the older mac, unplug all ethernet and remove any saved WiFi passwords – this will prevent it from auto-connecting to Wi-Fi during the transfer.
- On the newer mac, when it asks you how you plan to connect to the internet, there's an option for "I don't plan to connect to the internet" - select that one.
- Plug the old mac into the new mac via Thunderbolt
- On the newer mac select the I want to transfer from an existing Mac
- On the older mac, launch migration assistant, and select transfer to a new Mac
- Follow the instructions
- Thunderbolt should be seen as only connection option
- ZIPPY
Windows Operating System
Not software for the OS, but literally the Windows OS
Windows Hotkeys & Shortcuts
Windows System Wide
Windows-Shift-Arrow Left or Right will move the active window over from monitor to monitor (like the third party “Magnet” tool for Mac OS)
Windows-R will launch run
Windows-Shift-S screenshot saved to clipboard
Windows BIOS
“Delete” or “F2” key will launch BIOS
“F8” or “F12” will launch BIOS boot options
“F11” will launch Windows Recovery (safe mode, diagnostics, etc)
Windows Specific Troubleshooting
Boot & Error History
Hit that Windows key and type in "Reliability History" this will open "Reliability Monitor." If you type "Reliability Monitor", nothing comes up lol.
The Reliability Monitor will give you 1 year of graphs charting out hardware and software related issues. This is inclusive of software and hardware issues (e.g., Windows Diagnosis, Hardware Error). If you want more than 1 year of history, the bottom left of the window has a "Save reliability history" button – this saves a log of all issues into a nice and easy-to-read (not sarcastic) XML file. Obviously, this only goes back as far as when you installed Windows. If you wipe your drive, this all goes away.
To get an even finer comb, hit the Windows + R keys and type "eventvwr.msc". From there, you can create custom views. Set the event level to Critical, Warning, Error then By Log, Event Logs="Application,System" and then set the event ID to "41" to find all the naughty shut-downs.
Naughty C: Drive
Run Powershell as an Admin to check if bad shutdown fsutil dirty query C:
Result : "not dirty" is good
Run Command Prompt as an Admin to verify system
sfc /scannow
Wait for results, thenDism.exe /online /cleanup-image /CheckHealth
Wait for results, thenDism.exe /online /cleanup-image /ScanHealth
Wait for results, thenDism.exe /online /cleanup-image /RestoreHealth
Wait for results, thenchkntfs /x C:
Naughty RAM
Download MemTest, install it on a thumb drive using the included exe (this will format a thumb for you). Launch your BIOS’ boot options and boot from the thumbdrive. Wait a while. Now you know which RAM is the naughtiest. Replace it!
Windows Bootable Recovery
Windows has a built-in recovery partition, just like a Mac, but sometimes (if not frequently), that recovery partition gets borked and you need to reinstall a fresh version of Windows. To do this, from another Windows PC, download the Create Windows Media tool here, and plug-in a USB flash drive that’s 8Gb or greater (and that you’re happy to reformat). Then, you can run the MediaCreationTool, and it will take care of the rest (including formatting your thumb drive). When finished, plug that bad boy into the problematic machine, and select the drive in the boot menu. From there: good luck!
You’ve Got A Ton Of Displays And The Window You Want is On the Wrong God-Damn Display and You Can’t Find It Anywhere, Or Your Mouse Is Hidden: Where The Fuck Did It Go?
See windows hotkeys here. Or login to the computer via a VNC client that allows you to see all screens at once 😀
Windows Scripting
This is currently just some Bat scripts that are good to use and re-use
Auto Restart With A Delay Via a Bat Script
Useful for battle testing a computer with a naughty power supply.
@echo off
echo Your computer will restart in 2 minutes. Press Ctrl+C to cancel now.
timeout /t 30
shutdown /r /f /t 90 /c "Restarting in 2 minutes. Save your work!"
Auto Launch Some Applications With A Delay Via a Bat Script
Open up notepad, copy and paste the below code, replace with whatever file(s) + path(s) and whatever startup delays you want, save it as a .bat and throw it in shell:startup. I recommend doing a test with some garbage.txt files first just to make sure you did it right!
@echo off
timeout /t 30 /nobreak
start "" "C:\Users\CAM\Desktop\garbage.txt"
timeout /t 30 /nobreak
start "" "C:\Users\CAM\Desktop\garbage-2.txt"
Windows Commissioning
Be sure to disable all the BitLocker nonsense before you get hacky-wid-it. Some Regedit things will force an encrypted drive on next startup and who remembers to write down those codes?! Woof.
Setting Up A New Account
Oh no! You're trying to install Windows 11 on a new system and it's forcing you to create an online account and forcing you to sign in to Microsoft? And/or you're not connected to the internet and it's forcing you to get on the internet to setup Windows? And/or logging is gate-keeping you from doing your job? Yucky.
During the Windows setup process, press Shift + F10 to launch CMD during setup and type start ms-cxh:localonly
Congratulations! You don't have to login to a dummy Microsoft account (though you can do this later). You'll be prompted to create an offline account.
Disabling Windows Update
Obviously, there are serious issues that can be caused by disabling Windows Update, but if you’re installing a stable installation and you’re ideally quarantining it from the greater net, then disabling Windows Update might be necessary. A random update could break the whole install!
Windows 11 : Last Tested September 2025
Step 1 — Open the policy editor
Press Win + R → type gpedit.msc → Enter (Local Group Policy Editor opens).
Step 2 — Disable automatic updates
Go to: Computer Configuration → Administrative Templates → Windows Components → Windows Update → Manage end user experience
Open Configure Automatic Updates → set to Disabled → Apply → OK.
Step 3 — Block any connection to Microsoft’s update service
Go to: Computer Configuration → Administrative Templates → Windows Components → Windows Update
Open Do not connect to any Windows Update Internet locations → set to Enabled → Apply → OK.
Step 4 — Hide/disable the Windows Update UI (so no one can re-enable it)
Same folder (Windows Update)
Open Remove access to use all Windows Update features → set to Enabled → Apply → OK.
(This removes the Check for updates button and related controls.)
Step 5 — (Recommended) Prevent driver updates via WU
Same folder (Windows Update)
Open Do not include drivers with Windows Updates → set to Enabled → Apply → OK.
Step 6 — Apply the policies
Open an elevated Command Prompt (CMD with admin priv) and run:
gpupdate /force
Step 7 – Verify
Open up Windows Update and you'll notice that you can't update anything!
Windows 10 : Last Tested January 2025
First, you can disable it from running automatically when starting with the system. This works, but if you open Windows Update it will manually relaunch it. Not ideal.
- Open the Services Manager:
- Press Win + R, type services.msc, and hit Enter.
- Locate Windows Update Service:
- Scroll down to find Windows Update in the list.
- Disable the Service:
- Right-click on Windows Update and select Properties.
- Under the General tab, set the Startup type to Disabled.
- Click Stop if the service is currently running.
- Click Apply and OK.
- Reboot the Computer to ensure the changes take effect.
Then, you can disable it at an admin level so that it appears to be managed by group permissions. This seems to prevent automatic updates, but it seems to allow you to update manually.
- Open the Group Policy Editor:
- Press Win + R, type gpedit.msc, and hit Enter.
- Navigate to Windows Update Settings:
- Go to Computer Configuration → Administrative Templates → Windows Components → Windows Update.
- Modify Update Settings:
- Double-click on Configure Automatic Updates.
- Select Disabled, then click Apply and OK.
- Reboot the Computer to ensure the changes take effect.
Since that doesn’t completely kill it, you need to manually move the executable, or rename it. Permissions to do this are controlled by the system, so you can’t change it via properties. Instead, you have to do it using the command prompt run as administrator. This also gives you the ability to change the name back at a later date if you decide you do want to update Windows. Open Command
- Open Command Prompt as Administrator:
- Take Ownership:
takeown /f C:\Windows\System32\wuaueng.dll
- Grant Permissions:
icacls C:\Windows\System32\wuaueng.dll /grant %username%:F- if you’re username is “cam” then the string is
icacls C:\Windows\System32\wuaueng.dll /grant cam:F
- Rename the File:
ren C:\Windows\System32\wuaueng.dll wuaueng.dll.bak
- Restart the Computer.
Always-Works Method for Setting Up Windows Auto-Login
Last tested for Windows 10: January 2025, Windows 11: September 2025.
(If login creds need to change, do that first - just press the Windows key and type in change password and a system setting will pop up).
You can do the following insane effort … or run this utility from the Microsoft site called “Autologon” 🤦♀️
- Press Windows+R and type in regedit
- Select the path at top, delete it and paste:
- HKEY_LOCAL_MACHINE\SOFTWARE\Microsoft\Windows NT\CurrentVersion\PasswordLess\Device
- Find the entry: DevicePasswordLessBuildVersion DWORD
- Double-click on DevicePasswordLessBuildVersion and change its value from 2 to 0
- Close regedit
- RESTART
- Windows+R and type netplwiz
- Turn off checkbox to require password on login. If it’s already off, toggle it on and then off again. Either way, it will ask for your credentials.
- ** REBOOT TO CONFIRM ** sometimes a slow reboot
This has worked 100% of the time on different server configs. If it doesn’t, you can also try:
- Run Regedit.
- Copy and paste this path:
- HKEY_LOCAL_MACHINE\SOFTWARE\Microsoft\Windows NT\CurrentVersion\Winlogon
- Find the entry DefaultPassword
- Make sure it’s the right password
- Find the entry DefaultUserName
- Make sure it’s the right user name
- If neither entry is there, you can create the entries by right-clicking and creating a new string item.
Launch Some Application or Document on Startup
Windows+R, then type “shell:startup” – then throw a shortcut to that app or doc in that folder. Donezo.
If you want to do something more complicated, like boot apps in a specific order or put in some kind of delay, see Windows Scripting