
Tiles & Splits: A Projector Blend Rendering Case Study
This case study assumes some understanding of projection engineering and that the blend is happening on the Media Server side. It is possible to bake blends, but it’s not something I recommend unless you have to.
Splitting content up after a content render is more efficient then rendering splits at the source.
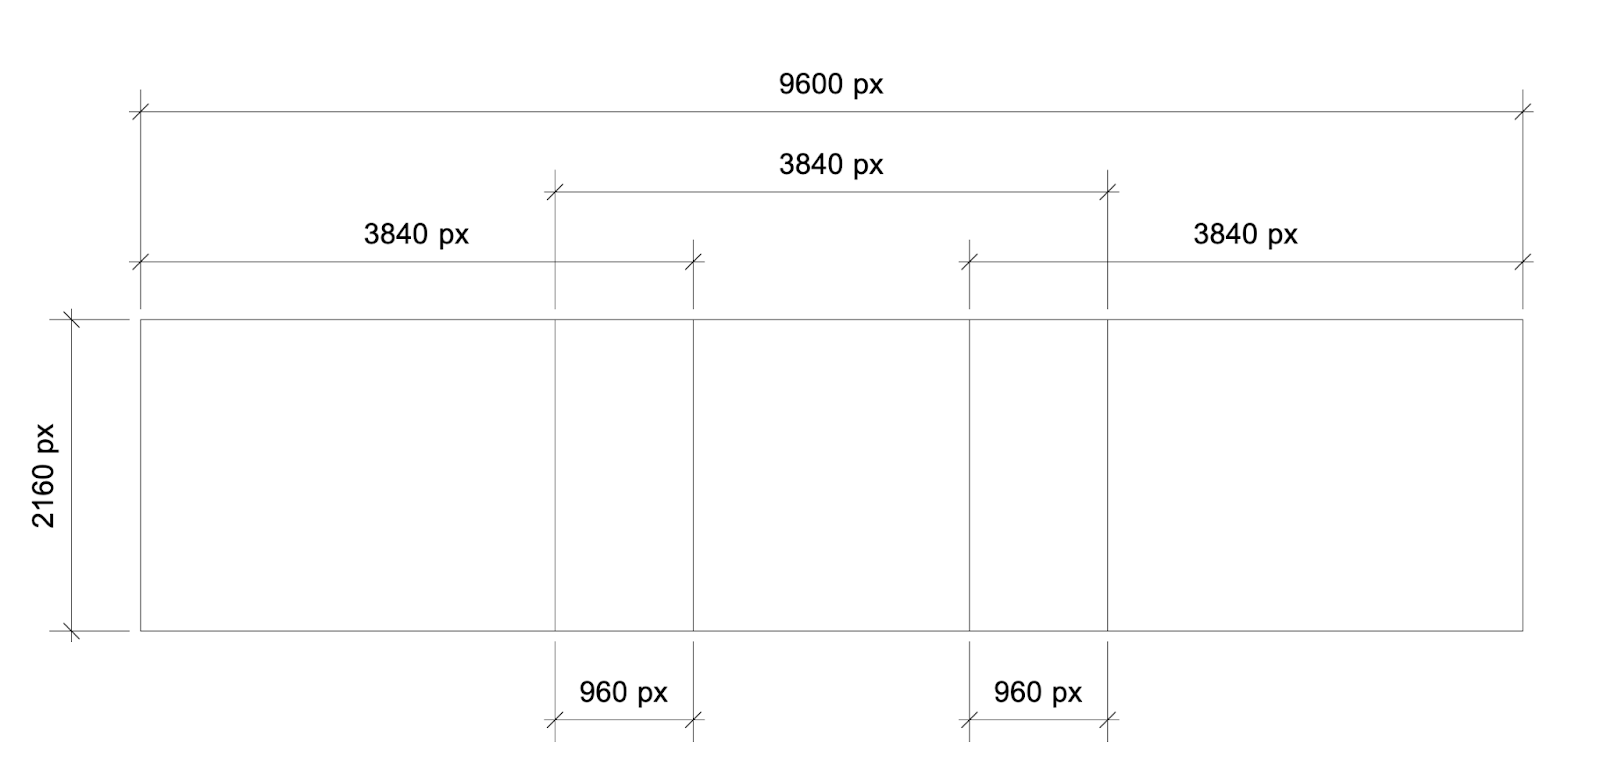
Say that I’m going to be projecting a 3x1 4k projector array at a 25% blend. This means that my overall canvas is 9600 px wide x 2160 px high. You could call this my “content canvas.” A template for creative folks would just be a blank canvas at that resolution. Typically, at higher resolutions, you may need to separate out your media into “splits” or “tiles” so that you are playing back efficiently on your show machine.
The obvious thing to do would be to configure your template so that you render out the slices from there. This is the easiest, less thinking required, method to rendering splits – but it’ll take a ton of extra time as the computer needs to process the whole canvas three times, instead of once! In some cases, say in Premiere, that might make sense – but in After Effects, this could really add a lot of render time, particular to high resolution renders.
Instead of processing your composition three times, you render it once and use a different tool to process it into splits. It requires less thinking to process your composition three times, but it requires less time to process it into splits as a post-creative-render process. Bottom line: It is faster to render the whole surface than pre-render splits in After Effects.
For doing this efficiently, I recommend FFMPEG – it absolutely rips through a splits process. That said – you can achieve similar ends using Premiere (but will require more QC, as there are greater human error possibilities), or Shutter Encoder (a great GUI for FFMPEG).
Below is an FFMPEG script that will take your source media at 9600 wide x 2160 high and split it into the 3 discrete projector outputs, including a 25% 960px overlap. It will not change the duration or change the quality provided that the source is Apple Pro Res 422. If there is any junk in the original encode, FFMPEG will inherit that junk “garbage in, garbage out” (i.e., non-square pixel aspect ratio, naughty frame rate, etc).
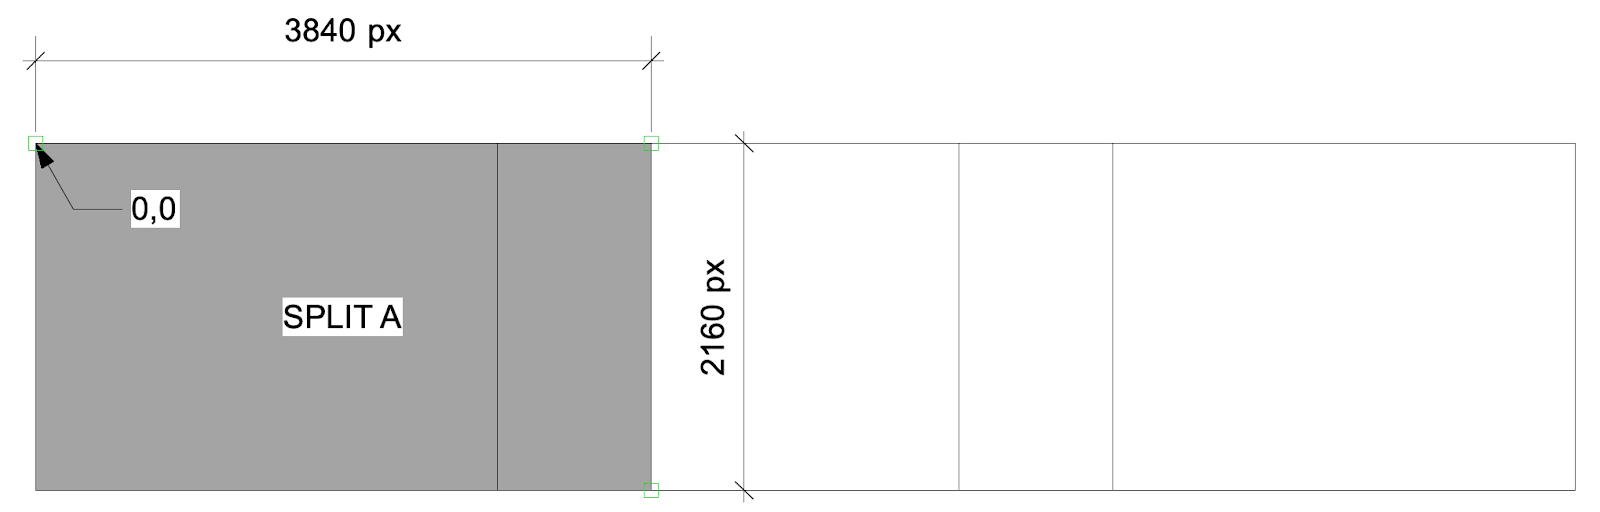
ffmpeg -i /Volumes/filepath/source9600x2160.mov -filter:v "crop=3840:2160:0:0"
-c:v prores_ks -profile:v 3 -pix_fmt yuv422p10le /Volumes/someotherfilepath/splitA.mov &&
ffmpeg -i /Volumes/filepath/source9600x2160.mov -filter:v "crop=3840:2160:2880:0"
-c:v prores_ks -profile:v 3 -pix_fmt yuv422p10le /Volumes/someotherfilepath/splitB.mov &&
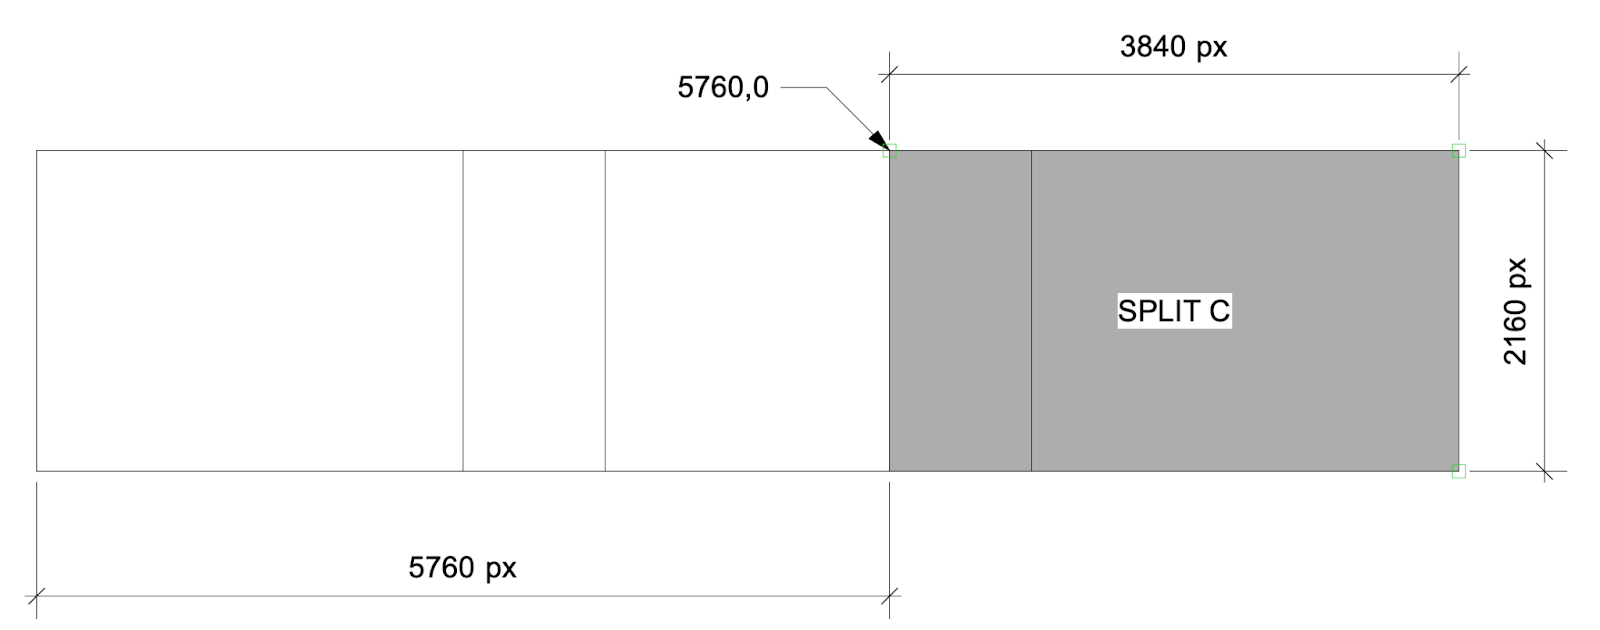
ffmpeg -i /Volumes/filepath/source9600x2160.mov -filter:v "crop=3840:2160:5760:0"
-c:v prores_ks -profile:v 3 -pix_fmt yuv422p10le /Volumes/someotherfilepath/splitC.movTo explain the script, the crop variable has four values – the first is the cropped width, the second is the cropped height, the third is the horizontal position of the top-left pixel of that crop, and the fourth is the vertical position of the top-left pixel of that crop. So for split B (/Volumes/someotherfilepath/splitB.mov), the output is 3840x2160, and we’re cropping from the original canvas where our top left pixel start is at pixel 2880 across and pixel 0 at the top. The diagrams over the next few pages illustrate how this works.
You can steal this script and use a spreadsheet with formulas so that you can change dimensions, the crops, the number of tiles, the source file location and name, and the exported file location and name.
If you get good with this, you’re worth your day-rate and more. Most production companies will use After Effects to run their splits because it can be automated – for super high resolution projects, this could take days! Even with a managed render farm.

Save everyone some time and do it on your tricked out laptop ✅
No comments to display
No comments to display